The beginner’s guide to Continuous Glucose Monitors


The most trustworthy source of food and
fitness journalism in the country.
Dear readers,
It’s me again, Samarth Bansal—your Editor, writing this week’s piece.
We now have thousands of you in our WhatsApp community groups—we had to start a third one, given high demand, and all keep buzzing—and among other things, it has helped me in listening: to have a more direct look at the questions people are asking, what they want to know, and how we can serve that through this newsletter.
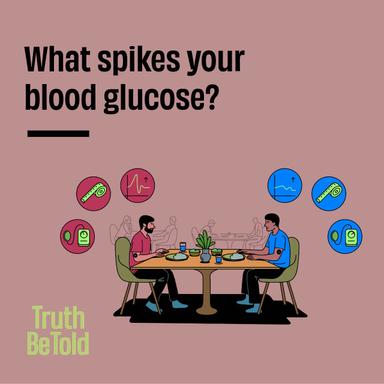
An often discussed question is about Continuous Glucose Monitors (CGMs). The nerds in the group keep sharing screenshots of their apps featuring spikes and falls. Those who get it, get it. Those who don’t either just ignore, or feel FOMO, or are left wondering what the hell is going on with these charts.
Hence, this piece. Think of what follows as a decision-making guide: Should you consider getting one? Does it really help? If yes, from where? What are the options available in India? How much does it cost?
I will keep it simple. Let’s start.
Step One: Understanding Metabolic Health
When it comes to health, there are many aspects to consider. One important concept that has gained attention recently is ‘metabolic health’. But what does it mean?
Simply put, metabolic health refers to how well our body handles the energy we get from food. It’s about how efficiently our body processes what we eat and drink, and how it manages our blood sugar levels.
You see, when we eat, our body breaks down food into glucose, which is a type of sugar that serves as the main source of energy for our cells. Our body needs to keep glucose levels within a healthy range — not too high, not too low. When glucose levels are well-regulated, we feel energetic, focused, and less likely to develop chronic diseases.
However, not all foods affect our blood sugar in the same way. This is where the Glycemic Index (GI) comes in. The GI measures how quickly a food raises blood sugar levels. High GI foods, like white bread or sugary drinks, cause a rapid spike in blood glucose. In contrast, low GI foods, such as whole grains, vegetables, and lean proteins, lead to a slower, more gradual rise.
By understanding the GI and being mindful of the foods we eat, we can make better choices to keep our blood sugar levels stable.
This is the essence of metabolic health.
Different foods have varying impacts on our blood sugar levels.
We have written about it here (introducing the idea of metabolic health and healthy ageing), here (deeper dive on understanding glucose spikes and why it matters), here (personal experience of our writer on using a CGM) and here (the case for measuring insulin levels).
It’s essential reading to fully understand this topic—especially if you’re considering investing in a glucose monitor to track your own metabolic health.
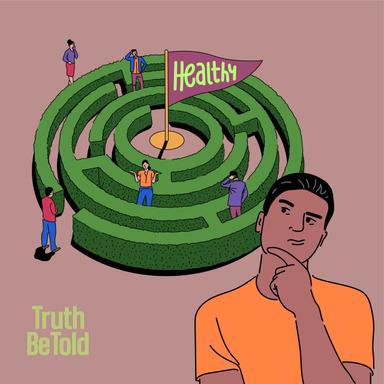
Step Two: Working on Metabolic Health
Now you know what metabolic health is. You are thinking: okay, let me work on this bit.
Is this the point you need to invest in a Glucose Monitor?
No. You don’t need it—yet.
Instead, do this.
First—and as much tiring and boring it might be for you to read it again and again in this newsletter, I will still keep repeating—focus on the basics: eat whole grains, eat a mix of veggies, eat enough protein, strength train, and sleep well. All the basics of a healthy lifestyle.
All aspects of fitness are built on these principles, and you don’t need any technology to follow them. It’s just habits. It’s about figuring out ways to implement these ideas in your day to day. And it’s hard. That’s where you start.
Don’t rush into using a glucose monitor before you’ve got a solid foundation in place.
Once you’ve got the basics down, you can move on to the next level: optimising your diet and lifestyle for better glucose control.
This brings me to my second point—which, my apologies, is again a repetition of stuff I have written in previous pieces—the fundamentals of good glucose control. Think of this as level one optimisation of your diet and lifestyle, where optimisation means you are going one step ahead of the basics.
Pasting from my previous piece:
Food pairing: Don’t eat naked carbs. Pair them with protein and fat. It leads to a lower spike. That’s why I eat my mid-morning fruit snack (mostly apple or banana) with peanut butter which has a good amount of fat and protein.
Eating protein and fat before a high-carb meal: this is another hack for a lower spike post your meal. For example, say two eggs before your potato sandwich.
Look for hidden sugars in processed foods: “Added sugar” is hiding in 74% of packaged foods, but it’s harder to spot given its 60+ alternative names. Some, like maltodextrin, have a higher GI (ranging from 106 to 136) than regular table sugar’s GI value of 65. Yikes. Avoid it.
Take a short walk after every meal: It works wonders to stabilise blood sugar. Muscles get actively engaged in walking and use excess glucose found in the bloodstream, lowering the spike. Do it.
Share this article and win a CGM (Conversation Guarantee with Mates) 😛
Step Three: Understanding the Device (continuous glucose monitor)
If you’ve already mastered the basics of metabolic health and have some disposable income to invest—it’s expensive—you might be ready to consider a CGM.
A CGM is a coin-sized device with a biosensor, usually applied on the back of the upper arm. It has a small probe and a microneedle that tracks blood-sugar levels in real-time by measuring the glucose in the fluid between your cells (interstitial fluid).
There are three key things to understand about CGMs:
1) CGMs are not just for diabetics
While CGMs have been used by diabetics for many years, their use for otherwise healthy adults is relatively new.
The idea is that better glucose control can improve overall health, prevent chronic diseases, and promote longevity. Some may call this a ‘hype’ generated by VC-funded startups, but while the long-term benefits for healthy individuals are not yet fully understood, there are strong theoretical reasons to believe it matters.
2) How CGMs work
A CGM has three components: a sensor, transmitter, and receiver.
The sensor is placed painlessly under the skin and measures glucose levels in the interstitial fluid, which is a proxy for blood glucose. This means that CGM readings may not always match finger-stick readings, which measure glucose directly from the blood.
However, CGMs provide continuous data that can reveal patterns and trends in glucose levels throughout the day.
3) CGMs can help you understand your unique response to food and exercise
The core argument for trying a CGM is that everyone responds differently to food and exercise, so no one diet or workout plan is ideal for everyone. By wearing a CGM, you can see how your body responds to different foods and activities and use that data to make informed choices about your diet and lifestyle.
It’s really, I’d say, a lab test—a way for you to peek inside your body.
In my experience, seeing the data from a CGM can make the idea of metabolic health feel more real and motivate you to take it more seriously.
If you’re thinking about trying a CGM, I recommend committing to at least a one-month self-experiment. Use the data to learn about your body, but don’t worry about making perfect choices right away. The goal is to gather information that you can use to make sustainable changes over time.
Which brings me to more specifics—next point.
Step Four: The Practical
Now you are at this stage where you really want to give this a shot. A few key things:
1) Duration and cost: First off, know that one CGM patch lasts for two weeks. So, if you’re following my recommendation of trying it for a month, you’ll need to buy two patches.
Now, let’s talk money. A single CGM sensor from Abbott (FreeStyle Libre) costs around Rs 5k. That means for a month-long experiment, you’re looking at a 10k investment. (But hold on, there might be ways to save a few bucks.)
2) Choosing a provider: In India, there are several companies offering CGMs, like Ultrahuman, CureFit, and HealthifyMe. (Just to be clear, this newsletter doesn’t endorse any particular brand. I’m just sharing names to help you navigate the market.)
Here’s the thing: all these companies use the same core sensor from Abbott. The hardware tech is the same.
What sets them apart is the software and support they offer on top of the hardware. We’re talking apps that help you log food, analyse data, and spot patterns.
Plus, some providers throw in coaching and community features to help you make sense of the numbers.
Different providers have different pricing packages, and these keep changing. Shop around, read reviews, and talk to people who have used these brands. You might be able to snag a discount. (The best deal I’ve found was Rs 3.5k for one sensor.)
3) Making the most of your CGM experience
For the first week or two, just observe. Don’t change your diet or exercise habits. Just go about your life and watch the data roll in. See how your glucose levels respond to your usual routines. Don’t stress about the spikes or crashes – this is all about learning.
In the last two or three weeks, it’s time to experiment. Make small tweaks to your diet and see how your glucose responds. Maybe swap your usual breakfast for something else and note the difference. Or try a new workout and see how it impacts your levels. The key is to take notes and start connecting the dots between your actions and your body’s reactions.
The most important thing? Approach this with a mindset of curiosity and learning. You’re not trying to be perfect. You’re just gathering data to help you understand your unique biology a little better.
That’s it for this guide. Hope it helps.
I will leave you with some testimonials from our WhatsApp community. I asked folks how wearing a CGM helped them. This is what they said.

Let us know if you have any more questions.
May all good things in your life spike 📈